Preparation
There's a few steps to take before getting underway. Generally speaking, once you've done these, you don't need to do them again from scratch.
Organising your files
Before you start setting up the server you'll need to organise the files you're going to transfer—your config, addons, and a few other things.
- download this mostly-empty server template
- unzip, then delete
server.zip
- enter the
server folder
- sort your addons into the subfolders in the addons folder (
characters, maps, and other); don't put any addons in the main addons folder, and leave the dud.txt files where they are
- write your server config in the
kartserv.cfg file in the config folder
- re-compress the
server folder to create server.zip
Later on you're going to transfer your copy of server.zip to your server using your FTP app.
Making an account
The easiest way to run a freestanding kart server is (probably) on a cheap commercial virtual private server (VPS). There's a few providers around that let you quickly and cheaply set up a VPS, such as DigitalOcean, Linode, and Vultr. Generally the service you need costs about $5 per month from any provider if you're running it constantly.
Before starting setup, you need to register an account with a hosting provider. If it helps resolve choice paralysis, I use DigitalOcean and haven't had any major problems with their service. A few bits of wording in this walkthrough are written with DigitalOcean in mind, but it should apply anywhere.
Walkthrough
Follow these steps to set up a server. For a shorter version without explanations, check the Cliff Notes.
Server space
First, set up your VPS by entering your default project and creating a new “droplet” (or whatever your provider calls their VPSes if they don't just call them VPSes). For location, choose a data center closest to your players. For image, you can probably choose the default. For plan, choose the cheapest that has at least these specs:
- core/CPU
- 1
- RAM
- 1GB
- SSD storage
- 25GB
- transfer
- 1TB per month upload/download speed
- IP address
- must have IPv4 (IPv6 doesn't matter)
Finally, for security, it's easier to create a password, but more secure to make an SSH key; go with whatever you prefer
For my server I use a DigitalOcean droplet in New York running Ubuntu 23.10 x64 on the Basic plan (shared CPU) with the specs above. This costs $6 per month of uptime right now (late 2023), but the real cost's much lower because I destroy the droplet after playing and rebuild it for the next session, so it's only active a few hours a week at most and the cost per hour's currently less than ¢1.
The specs above are more than you need, but better safe than sorry. You can go cheaper as long as you still get the IPv4 address.
Groundwork
Now you're going to create a new user in the VPS and give them some extra permissions. This user's going to be where you actually install the game and transfer your files. This helps keep this stuff separate from the root user's powerful capabilities.
- access the VPS using its console (on DigitalOcean: click the project name, then the droplet name, then “Access”; it may take a minute or two to become fully functional if you've just created the droplet)
- open the console as
root (the admin user)
- run
adduser srb2kart and follow the instructions (the only thing that matters is making a password, though, just leave the rest empty)
- run
usermod -aG sudo srb2kart
- close the console
From now on, any time you launch the console, launch it as srb2kart. Note that the console will still sometimes ask you to enter their password to run certain commands (mostly just the first sudo command you run in each console session).
Transferring files
Access your VPS using your FTP app with these login details:
- Host
- your VPS' IPv4 address, listed on its page
- Username
- srb2kart
- Password
- the password you set for the srb2kart user
- Port
- 22
You can now drag and drop your server.zip from your computer to the srb2kart folder on your VPS. Depending on how large your addons folder is, this may take several minutes, but you can get on with the next steps while it's transferring.
Getting the game
Now you can set up the game itself. You're going to use a docker—a portable container with the game inside. The most up-to-date docker is provided by ellitedev and works for SRB2K v1.6 (the current and final version of the game). You don't need to download anything from the source—the commands in this section do everything for you.
- open the console as
srb2kart (the new user)
- run
sudo snap install docker and wait for it to finish
- run
sudo docker run -it --name srb2kart -p 5029:5029/udp ellite/srb2kart-server:latest
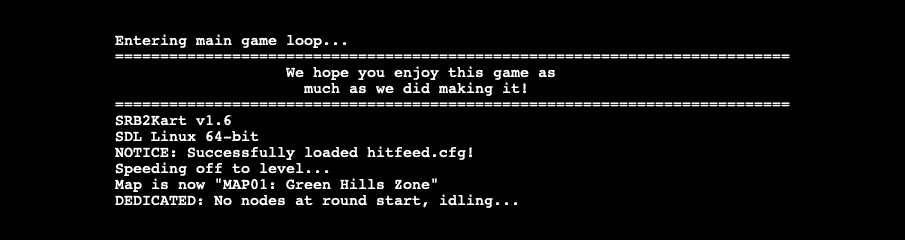
- wait until the game starts idling: No nodes at round start, idling...
- close the console
These commands set up the game, but in a very limited way—no addons, no config, and the server shuts down when you close the console. The rest of this walkthrough explains how to fix all that.
Automation
First, follow these instructions to let your kart server start running when someone connects even if the console isn't open:
- open the console as
srb2kart
- run
cd /etc/systemd/system
- run
sudo nano docker.srb2kart.service
-
copy and paste this text into the newly-created file:
[Unit]
Description=SRB2Kart Server
Requires=docker.service
After=docker.service
# Ref: https://www.freedesktop.org/software/systemd/man/systemd.unit.html#StartLimitIntervalSec=interval
StartLimitIntervalSec=60s
StartLimitBurst=2

[Service]
TimeoutStartSec=0
Restart=on-failure
RestartSec=5s
ExecStartPre=/usr/bin/docker stop %n
ExecStartPre=/usr/bin/docker rm %n
ExecStartPre=/usr/bin/docker pull ellite/srb2kart-server:
ExecStart=/usr/bin/docker run --rm --name %n \
	-v /home/srb2kart/server/config:/config \
	-v /home/srb2kart/server/addons:/addons \
	-v /home/srb2kart/server/luafiles:/luafiles \
	-p 5029:5029/udp \
	ellite/srb2kart-server:1.6

[Install]
WantedBy=multi-user.target
- save the file using Ctrl + O, then Enter
- exit the file using Ctrl + X
- run
systemctl enable docker.srb2kart
This creates and enables a “service”—in this case a set of commands that starts up the kart server and connects it to your addons and config. Your VPS runs these commands when someone connects to its IP in the game's multiplayer menu (unless the server's already running, in which case new players just join the existing game).
Final steps
Wait until server.zip finishes transferring before continuing. Finally, you can add your config and addons:
- run
cd
- run
sudo docker rm -f srb2kart
- run
sudo apt-get install unzip and wait for it to finish
- run
unzip server.zip
- run
bash server/scripts/update_addons.sh
- close the console
- shut down the VPS (on DigitalOcean: click the “On/Off” toggle)
- start up the VPS
- open the console as
srb2kart (when it starts working again)
-
run the following:
sudo docker run -it --name srb2kart -p 5029:5029/udp \
-v /home/srb2kart/server/config:/config \
-v /home/srb2kart/server/addons:/addons \
-v /home/srb2kart/server/luafiles:/luafiles \
ellite/srb2kart-server:latest
- wait until the game starts idling (it may also prompt you to hit Enter or take other actions while it starts up, before it can begin idling)
- close the console
At this point, your server's fully up and running: it's using your config, installing your addons, and can run when anyone connects even if the console isn't open and running the game. Once you know this whole process it should only take about 10–20 minutes to get from creating a VPS to running the full game, addons and all.
update_addons.sh is a script that deletes any files in the main addons folder, then copies all files in the characters, maps, and other subfolders (including subfolders of those three folders) into the main addons folder. The script fails if any of the three folders have no files inside. This is why the server.zip template has empty text files called dud.txt in each of those folders—so there's always something to copy, even if it's basically nothing. You need to put all your addons in one folder because the game won't find addons in subfolders of the addons folder, but putting all your addons in one folder can make things hard to find.
Restarting the Game
If you edit, add, or remove addon or config files on the server, or need to restart the game for any other reason, then follow these steps:
- open the console as
srb2kart
- run
sudo docker rm -f srb2kart
-
run the following:
sudo docker run -it --name srb2kart -p 5029:5029/udp \
-v /home/srb2kart/server/config:/config \
-v /home/srb2kart/server/addons:/addons \
-v /home/srb2kart/server/luafiles:/luafiles \
ellite/srb2kart-server:latest
Persistent Data
What about the fourth folder in the server folder, data? This lets the game store its state when everyone leaves the server and restart from the same state when people rejoin. In my opinion, it only matters if you're being really serious about points, but here's how to bind it to the docker if you care about that stuff.
Any time this walkthrough says to run the full docker command, run this version with with the marked extra line:
sudo docker run -it --name srb2kart -p 5029:5029/udp \
-v /home/srb2kart/server/config:/config \
-v /home/srb2kart/server/addons:/addons \
-v /home/srb2kart/server/luafiles:/luafiles \
-v /home/srb2kart/server/data:/data \
ellite/srb2kart-server:latest
You'll also need to update the matching commands in the docker.srb2kart.service file you created to automate the server.
Config
To change your server's configuration (e.g. change how the game works):
- edit the
kartserv.cfg file on your computer
- use your FTP app to transfer the file to the
config folder on your VPS (overwriting the existing one)
- restart the docker
A config file consists of a list of commands, one per line. The file can include blank or commented lines. Each command consists of a name and, normally, one or more “arguments” (inputs). For instance, a lot of them let you switch a setting on or off, and are written like this: [command name] [on/off]. There are many, many commands you can use to mechanically tweak the game.
Here's an example config file:
wait 10
password hunter2

// here's a comment in its own line;
// the game ignores all text between the double-slash and the end of the line

kartspeed 2 // here's a comment after a command, on the same line
// karteliminatelast off // here's a command that's deactivated by commenting it out
Some config commands must run a shortly after the game starts, otherwise they won't take effect. Make sure there's the command wait 10 at the start of the file so the game's already running before it applies any of your config.
Examples
Here are some of the more useful commands available in the game itself (no mods needed) if you're just starting out:
showjoinaddress off- hides players' IP addresses in the VPS' console
password [password]- sets a password you can enter in the in-game console to gain admin status, e.g.
password hunter2
login [password]- use this in the in-game console (accessed by pressing ` (or § on mac) to gain admin status, e.g.
login hunter2
kartspeed 0/1/2- sets the game speed to 0/easy (battle speed), 1/normal (the default in multiplayer races), or 2/hard (record attack speed)
karteliminatelast on/off- sets whether players start to explode once most players have finished the race (defaults to on)
kartfrantic on/off- sets whether powerful items appear more or less often (defaults to off)
advancemap 0/1/2/3- sets how the next map's decided after each round: 0/the same, 1/next in rotation, 2/random, 3/vote (defaults to 3)
Many non-map/character addons can be controlled using config commands; some (e.g. Hostmod) are completely inactive until activated this way (in config files or the in-game console).
Addons
To add addons/mods to your server (e.g. map packs, extra characters, new features):
- use your FTP app to transfer the files to the right subfolder in the
addons folder on your VPS (or overwrite or delete existing files)
- open the console as
srb2kart
- run
bash server/scripts/update_addons.sh
- restart the docker
You should always make the same changes to the files and folders on your own computer, e.g. if you add a new character file to server/addons/characters on the VPS then you should do the same thing on your computer. This way, if you need to rebuild the server from scratch, you can just re-zip the server folder on your computer and transfer it to the new VPS.
Examples
Here are some addons you may find useful in multiplayer:
bonuschars.kart- the pack of bonus characters that comes with the game; useful if you don't already have extra characters
- Hostmod
- a broad and powerful set of quality-of-life improvements (see documentation for more details)
- Hitfeed
- a feed of attacks, displayed at the top of the screen
- Drift Gauge
- a meter that shows how close you are to charging turbos while drifting
Some addons (e.g. all Hostmod features) need to be activated using commands. Some of these make sense to write in your config file so they'll automatically be applied when the server starts; others make sense to use in the in-game console as and when you need them. You'll have to decide this case by case.
Advice
Here's a few things to keep in mind:
-
It'll always take a little time for the VPS to fully start up for the first time or after being shut down. If you can't connect in the console, close it and reopen it after a minute.
-
The kart server will probably crash after idling for a long time, possibly due to a memory leak in the game. If this happens, restart the game. You may also need to restart the VPS if you can't connect or your framerate's grindingly slow.
-
On services like DigitalOcean you should only be charged for the time your VPS exists (or that you're storing a backup of it). If you only play a few hours a week (e.g. 3, 5, 10) it'll be much cheaper to destroy your VPS when you're done playing and rebuild it when you next want to play. It only takes me 10 minutes to follow the Walkthrough, including letting files transfer in the background; it might take you longer at first, but it's simple once you get used to it.
-
Your hosting provider may not install certain apps on their VPSes by default, e.g. they may not have snap (used to install docker) or apt-get (used to install unzip). In these cases the console should provide alternative instructions for installing software.
Cliff Notes
This is a list of all instructions in the Walkthrough with no extra info or explanations—it's a collection of all the pieces of code (and other instructions) in one place.
- set up your VPS
- open the console as
root
- run
adduser srb2kart and follow the instructions
- run
usermod -aG sudo srb2kart
- close the console
- transfer
server.zip to the srb2kart folder of the srb2kart user
- open the console as
srb2kart
- run
sudo snap install docker and wait for it to finish
- run
sudo docker run -it --name srb2kart -p 5029:5029/udp ellite/srb2kart-server:latest and wait for the game to start idling
- close the console and re-open it as
srb2kart
- run
cd /etc/systemd/system
- run
sudo nano docker.srb2kart.service
-
copy and paste this text into the file, then save and exit:
[Unit]
Description=SRB2Kart Server
Requires=docker.service
After=docker.service
# Ref: https://www.freedesktop.org/software/systemd/man/systemd.unit.html#StartLimitIntervalSec=interval
StartLimitIntervalSec=60s
StartLimitBurst=2

[Service]
TimeoutStartSec=0
Restart=on-failure
RestartSec=5s
ExecStartPre=/usr/bin/docker stop %n
ExecStartPre=/usr/bin/docker rm %n
ExecStartPre=/usr/bin/docker pull ellite/srb2kart-server:
ExecStart=/usr/bin/docker run --rm --name %n \
	-v /home/srb2kart/server/config:/config \
	-v /home/srb2kart/server/addons:/addons \
	-v /home/srb2kart/server/luafiles:/luafiles \
	-p 5029:5029/udp \
	ellite/srb2kart-server:1.6

[Install]
WantedBy=multi-user.target
- run
systemctl enable docker.srb2kart
- run
cd
- run
sudo docker rm -f srb2kart
- run
sudo apt-get install unzip and wait for it to finish
- run
unzip server.zip
- run
bash server/scripts/update_addons.sh
- close the console
- shut down and restart the VPS
- open the console as
srb2kart
-
run the following and wait for the game to start idling:
sudo docker run -it --name srb2kart -p 5029:5029/udp \
-v /home/srb2kart/server/config:/config \
-v /home/srb2kart/server/addons:/addons \
-v /home/srb2kart/server/luafiles:/luafiles \
ellite/srb2kart-server:latest
- close the console
Home
This is a walkthrough for setting up and managing an online multiplayer server for Sonic Robo Blast 2 Kart (SRB2K) so you can play online with privacy and stability for everyone.
The main sections are Preparation and Walkthrough. Everything else is advice and info on maintaining your server once it's up and running.
This will get a little technical, but it's not that complicated. Mostly you just need to copy and paste bits of code and hit enter.
This walkthrough's only for making a private server. If you want your server to show up in the game's server browser then you'll need to do extra work and maintenance beyond the scope of this walkthrough.
Requirements
You will need:
- the game on your computer
- a few dollars per month (at most) to pay for hosting
- an FTP client app (e.g. FileZilla)
Since the game's available for all common operating systems, and since most of this process takes place on a server somewhere, it doesn't really matter what operating system you personally use.